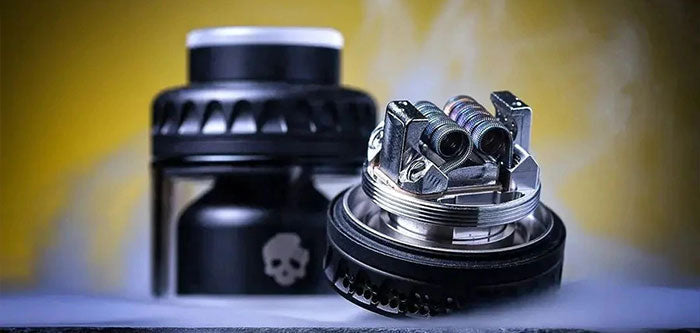
Build - Single Coil
Coil
5/6 wrap 4mm ID Coil, recommended leg length 6mm
 Position
Try and keep the top of the coil inline or just below the top of the side air posts. The coil can be positioned centrally which should provide a more restricted vape or the coil can be positioned to one side next to the air post to provide a less restricted vape.


Dry Burn
Set at a low power pulse fire the coil to check for any hot spots, if present, gently strum the coil with ceramic tweezers this should remove the hotspots and the coil should slowly glow from the middle wrap outwards. If strumming with metal tweezers or a coiling rod ensure the coil is not being pulse fired at the same time.
Wicking
Thread the wick through the coil, it doesn’t need to be tight but should fill out the inside of the coil, cut the wick tails a little bit past the deck sides. Fluff the wick ends at either side and guide them into the wicking channels. The ends of the wick should pass through the wicking channels and just reach the base underneath. It doesn’t have to be perfect as the Blotto Max is a very forgiving RTA.


Priming
Apply a small amount of juice to the wick ends above and below the wicking channels, repeat a few times until the tails are suitably soaked. Apply juice to the top of the coil and slowly pulse the coil to suck it in, again repeat a few time until suitably soaked.

Assemble the tank, fill it up and enjoy.
Build - Dual Coil
Coil
5 wrap 3mm ID Coils, recommended leg length 4~5mm
Position
Similar to the Single coil build, try and keep the top of the coil inline or just below the top of the side air posts. The coil can be positioned close to each other which should provide a more restricted vape or the coil can be positioned to the sides next to the air posts to give a larger gap in the centre which will provide a slightly less restricted vape.
As previously stated, the Blotto Max is such a forgiving RTA and when using quality coils it is a breeze to build on.


Dry burn
Make sure the coils are not touching each other or touching any part of the deck and 272° airflow posts.
As with the single build set at a low power pulse fire the coils to check for any hot spots, if present, gently strum and pinch the coils with ceramic tweezers this should remove the hotspots and the coils should both slowly glow from the middle wraps outward equally. If strumming and pinching with metal tweezers ensure the coils are not being pulse fired at the same time.
Both coils should be glowing evenly and together.
Wicking
Wick the same way as the single coil build, however this time some gentle raking is probably going to be needed to thin out the wick ends a bit. The wicking into the channels can be quite loose but it needs to be fluffy enough to fill all of the channels, too loose and leaking could be a result.


Priming
Follow the same process as with the single coil build.

Assemble the tank, fill it up and enjoy.
TIPS
If your new to RTA’s it’s probably a good idea to just ¼ fill to start off with, start off at a low power and slowly work it up to the desired vape. If you do find issues it’s then easier to dismantle and adjust, or if it’s leaking you’ll lose less juice.
If you like the look of the coils shown in this guide and wondering how to get hold of coils like this, you can find out further details here… Reggie Coils

